



Connect Sensors & Relays to Your GEIA Node
Connect sensors and relays to a GEIA or compatible DIY node, add them in the app, test them, and try a simple automation.
Step-by-step
What You Need
Start with a node that is already flashed and paired with your GEIA account. You can add one sensor, one relay, or both.
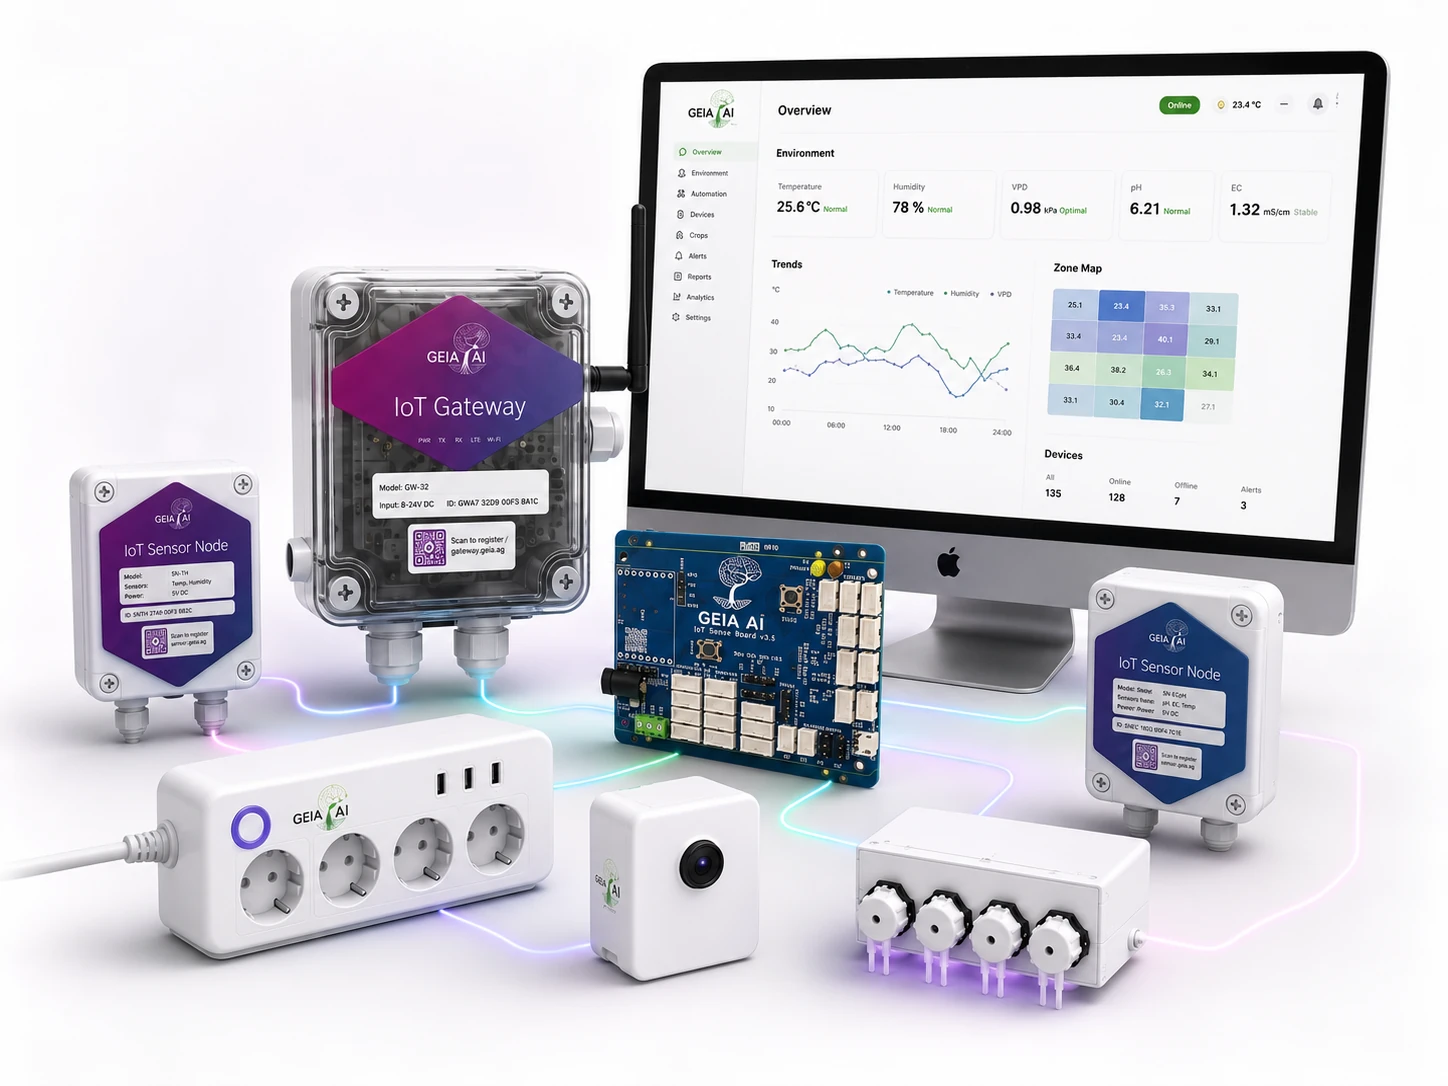
The hardware browser also provides wiring information, datasheets, product links and manufacturer links where available.
Connect the Relays
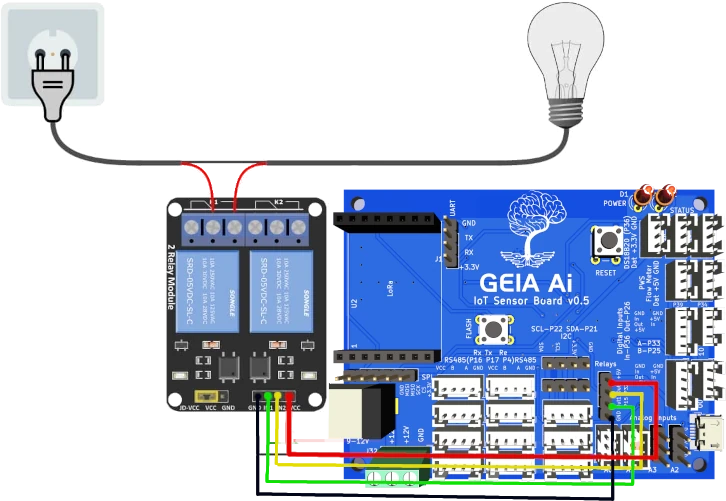
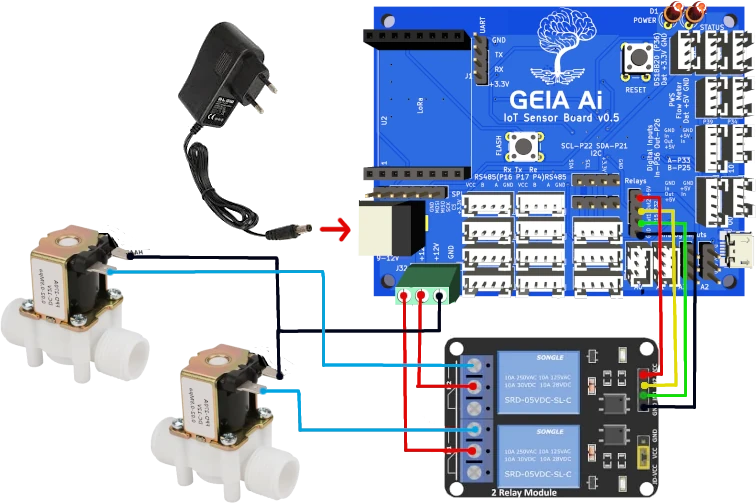
Disconnect power first. Connect the relay control side to power, ground and a supported digital GPIO. Follow the diagram for your board and relay module.
Connect the 2-relay add-on
Use the GEIA Board relay connection and the GPIO assignments shown in the wiring diagram.
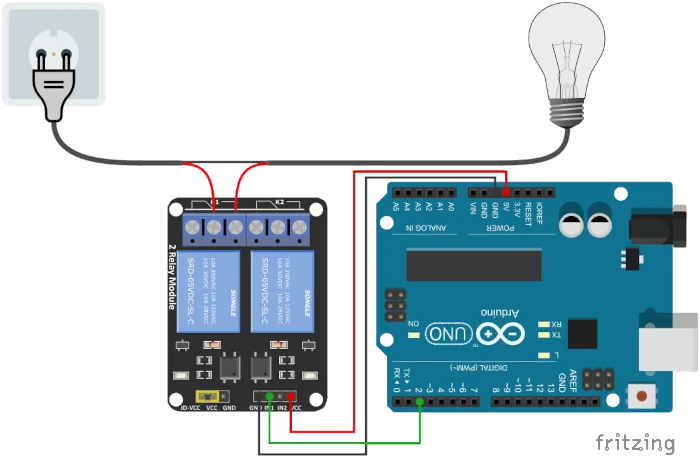
Connect relays to a Wemos D1
Connect relay VCC and GND correctly, then connect each signal input to a supported digital GPIO shown in the Wemos wiring diagram.
Add Relays in the App
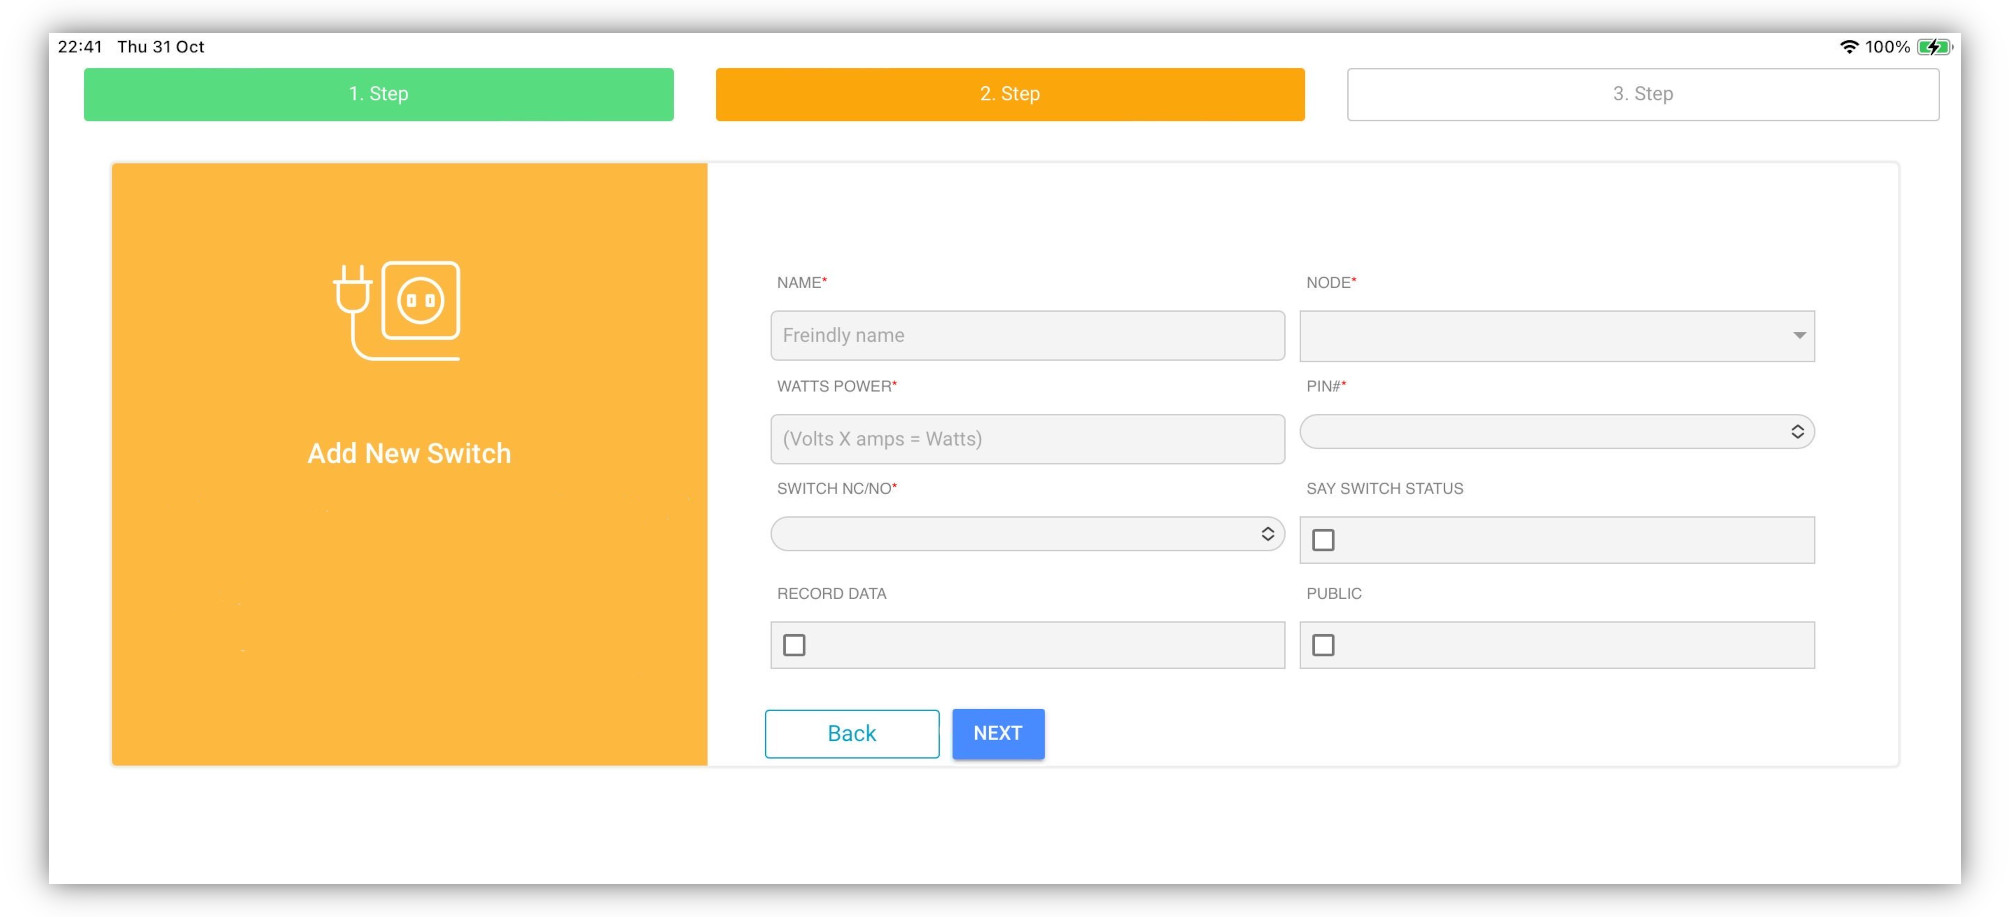
Open Hardware Status → Add Hardware (+) → Switch / Actuator in the GEIA app.
Start the wizard
Choose the switch, relay, solenoid or actuator type you want to add.
Configure the relay
- Name the appliance controlled by the relay.
- Select the node connected to the relay.
- Enter the appliance’s normal watt usage.
- Select the correct pin or GPIO.
- Select NO or NC to match the wiring.
- Choose whether the app should speak when it switches.
- Choose whether GEIA should record appliance usage.
Test and save
Use the test button and confirm that the correct relay changes state. When everything works, save the relay.
The watts value is used for usage estimates. It does not change the electrical capacity of the relay.
Connect the Sensors
Disconnect power and check the sensor’s wiring information. Connect it only to a port that supports its voltage and signal type.

Add Sensors in the App
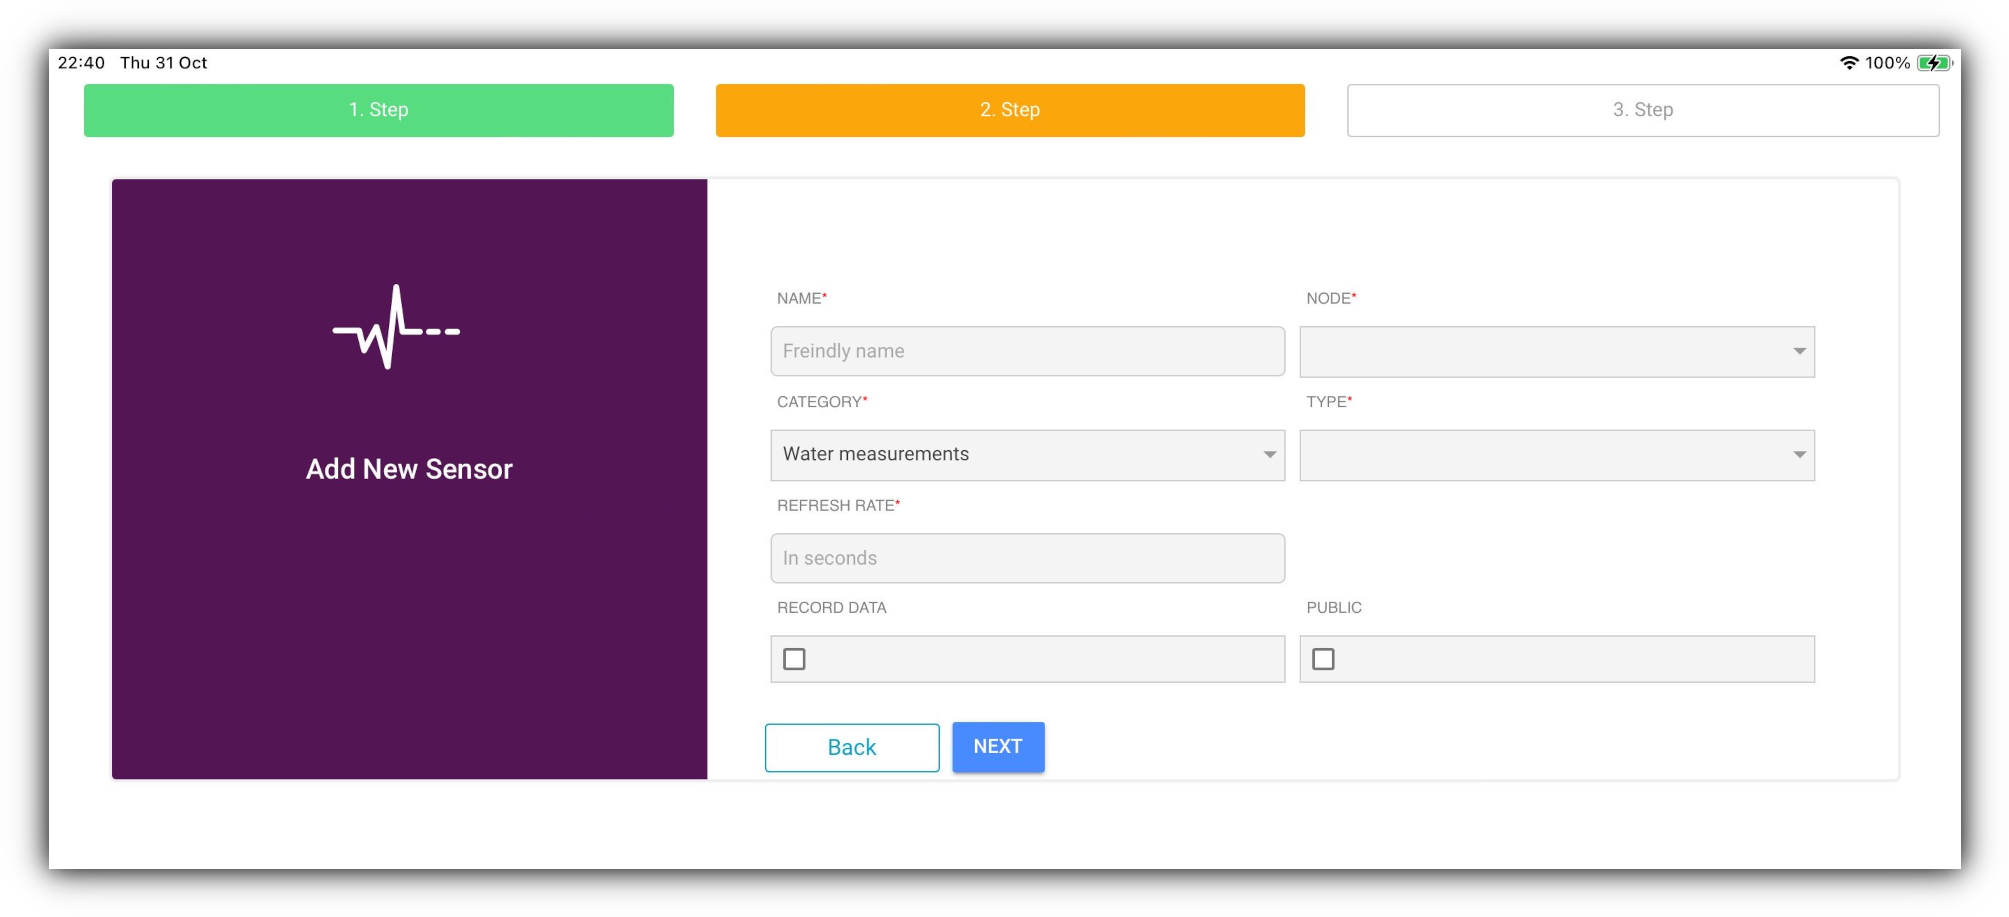
Open Hardware Status → Add Hardware (+) → Sensor in the GEIA app.
Start the wizard
Start adding a sensor and continue to its configuration screen.
Configure the sensor
- Give the sensor a clear name.
- Select the node connected to it.
- Select its category and sensor type.
- Select the required pin or GPIO when shown.
- Choose the refresh rate in seconds.
- Choose whether readings should be logged.
- Select the data-record rate in minutes.
Calibrate or test
Complete calibration when it is available. Otherwise, check the live reading and confirm that the sensor works before saving it.
When using the web app, the node and its gateway must be connected to the internet.
Try a Simple Automation
Your sensor and relay are now ready to use. Create one simple automation to confirm that both devices appear and can work together.
- Open Automations and select a suitable automation function.
- Choose the sensor as its input and the relay as its output.
- Enter a safe test threshold or schedule.
- Save it and confirm that the correct relay responds.
- Test everything before leaving the automation unattended.
This is only a quick test. Separate guides can explain each automation function and its safety settings in detail.
Automation safety note
Disconnect all power before connecting sensors or relays. Use only low-voltage wiring unless you are qualified to work with mains electricity. Never wire 110/230 V while powered. Check the relay’s voltage, current and load ratings, including the startup current of pumps, fans and motors. For most appliances, use NO so the appliance turns off if control power is lost.

