Interact easily with MQTT
Use MQTT Protocol for switching lights or Get Sensor data
Introduction
The GEIA Grow Hub (an IoT Gateway) is a special device that bridges internal devices connected to various systems with the GEIA.AI platform. The Grow Hub MQTT API facilitates data exchange between multiple devices and the platform using a single MQTT connection. As a GEIA.AI device, the Gateway can utilize the existing MQTT Device API to report statistics, receive configuration updates, and much more.
The API listed below is used by the GEIA.AI open-source IoT Gateway.
Obtaining MQTT Access
For demo purposes, you can obtain demo access to MQTT by joining our developer Discord channel, where a bot will handle the setup for you – Just send a Hello message on the #developers channel. (Discord invite link: https://discord.gg/7yTnADMH4P).
For live access, please contact us and provide your Master Grow Hub’s external IP or the email address you use to log in to the APP. If you don’t have the Master Grow Hub, please indicate that in your request.
MQTT Connect
You can connect to MQTT internally or over the internet:
For internal connections:
- Hostname: GEIA-Gateway.local
- Internal IP: Can be found in the APP
- Port: 1883
- WS (Un-secure Web Socket): 9001
- WSS (Secure Web Socket): 9002
For external connections:
- Hostname: Can be found on the Grow Hub page, such as mqtt01.geia.ai
- Port: 1883
- WSS (Secure Web Socket): 9002
MQTT Topics Structure
Below is the structure of our MQTT topics. You can obtain the IDs using our Rest API; see the Rest API documentation for details.
Note: When connecting externally over the internet, {location_id} is required in the topics. If you connect locally, you must remove it, and topics will start without "/".
Actuators & Switches (Normal Switch):=> publish 1 or 0
/{location_id}/e/r/{actuator_id}/switch
Actuator & Switches Change Status Confirmation:
/{location_id}/e/r/{actuator_id}/switch/confirm
Enable / Disable Automation on actuator & switches => publish For Enable: 1 1 or 1 0 And 0 For disable:
/{location_id}/e/r/force/{actuator_id}
Automation switch status:
/{location_id}/e/r/force/{actuator_id}/rstate
Listen to Sensor values:
/{location_id}/e/s/{sensor_id}
Listen to all sensors:
/{location_id}/e/s/#
Request Node Info => publish 1
/{location_id}/e/{node_id}/info/request
Listen to Node Info
/{location_id}/e/{node_id}/info/#
Listen to Node Local IP
/{location_id}/e/{node_id}/info/localIP
Listen to Node Uptime
/{location_id}/e/{node_id}/info/uptime
Listen to Node WiFi Signal strength
/{location_id}/e/{node_id}/info/rssi
Reboot Node => publish 1
/{location_id}/e/{node_id}/reboot
Reboot Node confirmation
/{location_id}/e/{node_id}/reboot/confirm
Listen to all topics:
/{location_id}/+/#
Finding My MQTT Topics
You can use our Rest API, such as Get Sensors, Get Actuators, and Get Nodes, to programmatically get IDs.
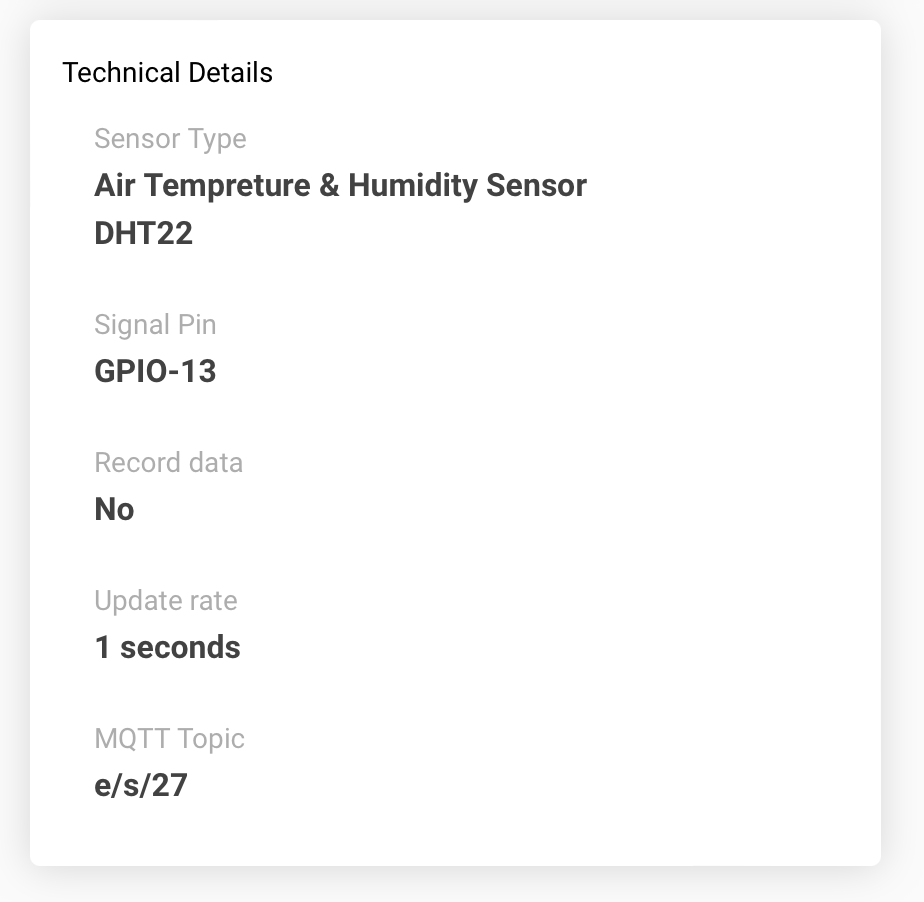
Alternatively, you can find MQTT topic addresses in our APP on the Node, Sensor, or Actuator details page. See example screenshot below:

MQTT Publish
You can publish any data on MQTT and topics, including your own. For switching actuators, switches, and relays, send the value “0” or “OFF” to turn off, or “1” or “ON” to turn on. You can use QOS 1 or QOS 2.
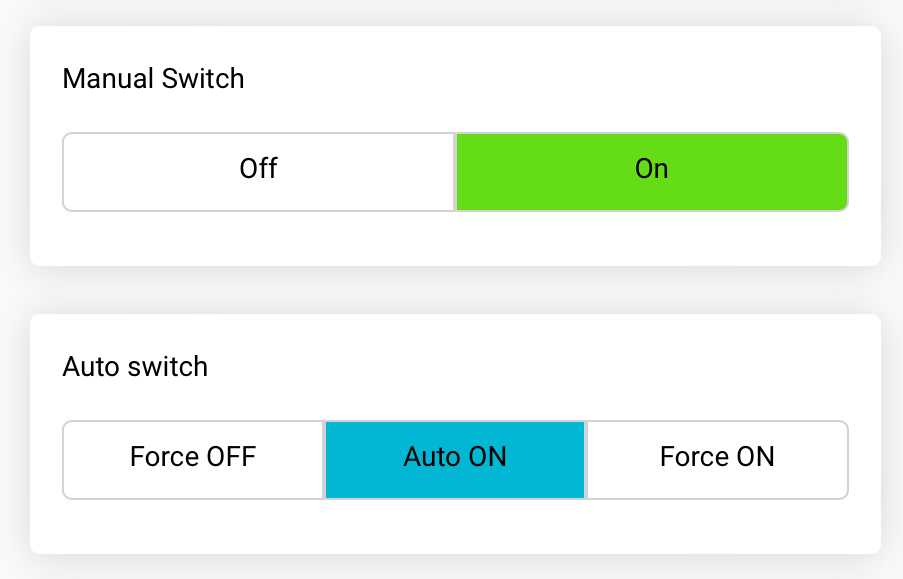
Automation Force Switch: When an automation function uses this switch, you cannot switch the appliance using the normal method (the function might override it immediately). To properly switch in this case, use the automation force switch, which offers three options:
- Switch Automation Off & Turn Appliance ON =>
{1 1} - Switch Automation Off & Turn Appliance OFF =>
{1 0} - Switch Automation ON =>
{0} - Once in position 1 or 2, you can use the normal switch as well, using “ON” and “OFF” or “1” and “0.”

// Install MQTT client - for linux
sudo apt-get install mosquitto-clients

// Install MQTT client - for MacOS
brew install mosquitto-clients
# Internal connection
mosquitto_pub -h GEIA-Gateway.local -p 1883 -u "your-username" -P "your-password" -t "your/topic" -m "your-message"

# External connection
mosquitto_pub -h mqtt01.geia.ai -p 1883 -u "your-username" -P "your-password" -t "/{location_id}/your/topic" -m "your-message"

# Messege: 0 or 1
Install paho-mqtt
pip install paho-mqtt
import paho.mqtt.client as mqtt

# Define the MQTT settings
broker = "mqtt01.geia.ai"
port = 1883
username = "your-username"
password = "your-password"
location_id = "your-location-id"
topic = "/" + location_id + "/your/topic"

# Connect to MQTT Broker
client = mqtt.Client()
client.username_pw_set(username, password)
client.connect(broker, port)

# Publish a message
client.publish(topic, "Hello, MQTT!")
client.disconnect()
Sample below includes mqtt.js
For NodeJS: Install mqtt.js
npm install mqtt --save
<!DOCTYPE html>
<html>
<head>
<title>MQTT Connect and Publish</title>
<script src="https://unpkg.com/mqtt/dist/mqtt.min.js"></script>
</head>
<body>
<button id="publishBtn">Publish</button>
<p id="message">Waiting for MQTT message...</p>

<script>
const client = mqtt.connect('wss://mqtt01.geia.ai:8083', {
username: 'your-username',
password: 'your-password'
});

const location_id = 'your-location-id';
const topic = '/' + location_id + '/your/topic';

client.on('connect', () => {
console.log('Connected');
document.getElementById('publishBtn').addEventListener('click', () => {
client.publish(topic, 'Hello, MQTT!');
console.log('Published message');
});
});

client.on('message', (topic, message) => {
console.log(`Received message: ${message.toString()} on topic ${topic}`);
document.getElementById('message').innerText = `Received message: ${message.toString()} on topic ${topic}`;
});
</script>
</body>
</html>
Install the PubSubClient plugin
#include <WiFi.h>
#include <PubSubClient.h>


// WiFi settings
const char* ssid = "your-SSID";
const char* password = "your-WIFI-password";

// MQTT settings
const char* mqtt_server = "mqtt01.geia.ai";
const int mqtt_port = 1883;
const char* mqtt_user = "your-username";
const char* mqtt_password = "your-password";
const char* location_id = "your-location-id";
String topic = "/" + String(location_id) + "/your/topic";

WiFiClient espClient;
PubSubClient client(espClient);

void setup() {
  Serial.begin(115200);
  setup_wifi();
  client.setServer(mqtt_server, mqtt_port);
  client.connect("ArduinoClient", mqtt_user, mqtt_password);
  client.publish(topic.c_str(), "Hello, MQTT!");
  client.disconnect();
}

void setup_wifi() {
  delay(10);
  WiFi.begin(ssid, password);
  while (WiFi.status() != WL_CONNECTED) {
    delay(500);
    Serial.print(".");
  }
  Serial.println("WiFi connected");
}

void loop() {
}
MQTT Subscribe
Subscribe and listen to a topic to receive messages live as soon as they are sent.
# Internal connection
mosquitto_sub -h GEIA-Gateway.local -p 1883 -u "your-username" -P "your-password" -t "your/topic"

# External connection
mosquitto_sub -h mqtt01.geia.ai -p 1883 -u "your-username" -P "your-password" -t "/{location_id}/your/topic"
Install paho-mqtt
pip install paho-mqtt
import paho.mqtt.client as mqtt

# Define the MQTT settings
broker = "mqtt01.geia.ai"
port = 1883
username = "your-username"
password = "your-password"
location_id = "your-location-id"
topic = "/" + location_id + "/your/topic"

# Callback function on receiving a message
def on_message(client, userdata, message):
    print(f"Received message: {message.payload.decode()} on topic {message.topic}")

# Connect to MQTT Broker and subscribe
client = mqtt.Client()
client.username_pw_set(username, password)
client.on_message = on_message
client.connect(broker, port)
client.subscribe(topic)

client.loop_forever()
Sample below includes mqtt.js
For NodeJS: Install mqtt.js
npm install mqtt --save
<!DOCTYPE html>
<html>
<head>
<title>MQTT Subscribe</title>
<script src="https://unpkg.com/mqtt/dist/mqtt.min.js"></script>
</head>
<body>
<p id="message">Waiting for MQTT message...</p>

<script>
const client = mqtt.connect('wss://mqtt01.geia.ai:8083', {
username: 'your-username',
password: 'your-password'
});

const location_id = 'your-location-id';
const topic = '/' + location_id + '/your/topic';

client.on('connect', () => {
console.log('Connected');
client.subscribe(topic);
});

client.on('message', (topic, message) => {
console.log(`Received message: ${message.toString()} on topic ${topic}`);
document.getElementById('message').innerText = `Received message: ${message.toString()} on topic ${topic}`;
});
</script>
</body>
</html>
Install the PubSubClient plugin
#include <WiFi.h>
#include <PubSubClient.h>


// WiFi settings
const char* ssid = "your-SSID";
const char* password = "your-WIFI-password";

// MQTT settings
const char* mqtt_server = "mqtt01.geia.ai";
const int mqtt_port = 1883;
const char* mqtt_user = "your-username";
const char* mqtt_password = "your-password";
const char* location_id = "your-location-id";
String topic = "/" + String(location_id) + "/your/topic";

WiFiClient espClient;
PubSubClient client(espClient);

void callback(char* topic, byte* payload, unsigned int length) {
  Serial.print("Message arrived [");
  Serial.print(topic);
  Serial.print("] ");
  for (int i = 0; i < length; i++) {
    Serial.print((char)payload[i]);
  }
  Serial.println();
}

void setup() {
  Serial.begin(115200);
  setup_wifi();
  client.setServer(mqtt_server, mqtt_port);
  client.setCallback(callback);
  client.connect("ArduinoClient", mqtt_user, mqtt_password);
  client.subscribe(topic.c_str());
}

void setup_wifi() {
  delay(10);
  WiFi.begin(ssid, password);
  while (WiFi.status() != WL_CONNECTED) {
    delay(500);
    Serial.print(".");
  }
  Serial.println("WiFi connected");
}

void loop() {
  client.loop();
}
Using MQTT with VPN
You can connect to MQTT using either the encrypted or unencrypted port.
To enhance security (also locally), you can also use a VPN or SSH Tunnel. Please contact us if you need free additional VPN access. Note that the VPN communicates only with our MQTT servers.


