


Es befinden sich keine Produkte im Warenkorb.
Overview
Build a Custom greenhouse Hydroponics Automation Script
Build your own Arduino, Python or Node.js greenhouse hydroponics automation, read GEIA sensor values over MQTT, control a relay, and keep GEIA dashboards and manual overrides connected.
Steps
Step-by-step
01
What You Need
A custom automation is your own small program. It listens to GEIA sensor values, makes a decision, and sends a command to a relay or actuator.
GEIA access
An account, API access and the separate MQTT JWT.
Sensor in GEIA
A working sensor with its Sensor ID and correct unit.
Relay in GEIA
A paired relay or actuator with its Actuator ID.
Safe test load
Use a low-voltage lamp or indicator for the first test.

Important: This guide assumes the sensor and relay are already added in the GEIA app and confirmed working. Do not begin by testing with a pump, heater, dosing system or other risky appliance.
02
Choose Where Your Script Runs
The same automation idea can run on a microcontroller, a computer or a GEIA edge device. Choose the place that fits your project.
Main example
Arduino / ESP32
Good for a small always-on controller. The downloadable sketch uses ESP32, Wi-Fi and PubSubClient.
Included companion
Python
Good for GrowMaster Edge, Raspberry Pi, Linux or a development computer. A complete Python version is included.
Easy to adapt
Node.js
Good for services, integrations and web backends. Use mqtt.js with the same JWT, topics and automation logic.
| Connection | MQTT address | REST API address | Topic format | Best for |
|---|---|---|---|---|
| GrowMaster / Gateway | Local hostname or IP shown in the app | Local API address supplied by GrowMaster | e/... |
Fast local control and unreliable internet |
| GrowMaster Edge | Local Edge hostname, IP or local service address | Local Edge API address | e/... |
Python, Node.js and larger local automations |
| GEIA Cloud | Assigned cloud MQTT hostname and port | Assigned GEIA Cloud API base | /LOCATION_ID/e/... |
Remote integrations, testing and non-critical control |
Local + cloud: GrowMaster/GrowMaster Edge synchronizes supported data and configuration with GEIA Cloud. Your automation can stay local while the app and cloud history remain connected.
Use the exact hosts and ports assigned in your GEIA app or developer dashboard. The names above explain the connection type; they are not credentials.
03
Get Access, IDs & Topics
Both growers and developers can receive API access. Choose the account type by what you are building.
Live grow
Sign up as a grower
Use the live grow dashboard for your own farm or grow system. API access is provided with the account.
Development
Sign up as a developer
Use the developer path for testing, scripts, plugins and integrations. It creates API access and a development dashboard.
Use the MQTT JWT: The example does not store your GEIA account username and password. Copy the dedicated MQTT JWT generated by GEIA. Do not confuse it with the REST API access token or refresh token.
1
Copy the connection details
- MQTT host and port
- MQTT JWT
- API base, access token and refresh token if your script will also use REST
2
Copy the GEIA IDs
- Location ID for a direct cloud connection
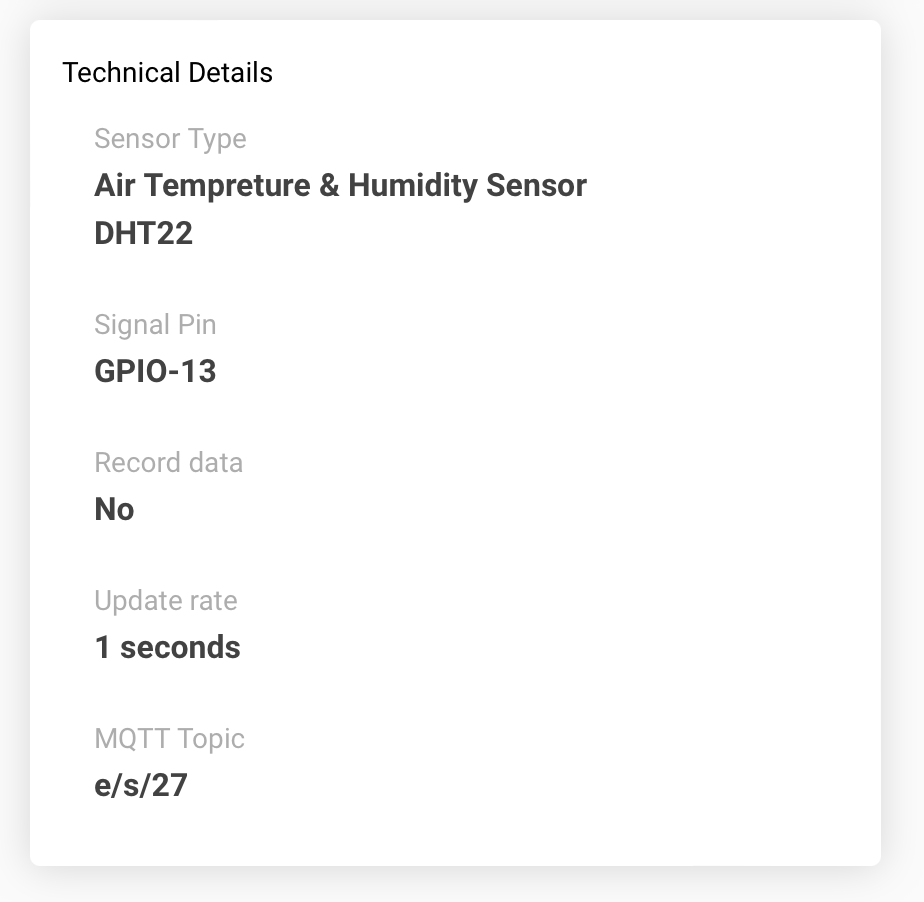
- Sensor ID
- Actuator or relay ID
Keep every JWT and API key private. Do not include real values in screenshots, public repositories or a community upload.
04
Configure the Automation Bot
The example is a small heater bot. It listens to a remote temperature sensor, checks the relay state, respects manual force control and sends a relay command only when needed.
Receive sensor value
Check limits + override
Send relay command
Confirm relay state
| Purpose | Local topic | Direct cloud topic |
|---|---|---|
| Sensor value | e/s/SENSOR_ID | /LOCATION_ID/e/s/SENSOR_ID |
| Relay confirmation | e/r/ACTUATOR_ID/switch/confirm | /LOCATION_ID/e/r/ACTUATOR_ID/switch/confirm |
| Force/manual state | e/r/force/ACTUATOR_ID/rstate | /LOCATION_ID/e/r/force/ACTUATOR_ID/rstate |
| Relay command | e/r/ACTUATOR_ID/switch | /LOCATION_ID/e/r/ACTUATOR_ID/switch |
Change these first
- Wi-Fi SSID and password
- MQTT host, port and MQTT JWT
- Local/cloud mode and Location ID
- Sensor ID and Actuator ID
Example behavior
- Heater ON at or below 20°C
- Heater OFF at or above 22°C
- Safe OFF after two minutes without sensor data
- Pause while GEIA manual force override is active
Guide code field: paste the raw contents of geia-custom-automation-bot-esp32.ino into this step's Copyable code snippet field and set the language label to Arduino / C++.
Step 04 code · ARDUINO
/*
  GEIA Custom Automation Bot - ESP32 / Arduino

  This example:
    1. Connects to a GEIA MQTT server with a GEIA MQTT JWT.
    2. Reads a remote sensor value from MQTT.
    3. Reads the confirmed state of a remote relay.
    4. Respects the GEIA force/manual-override state.
    5. Uses hysteresis to switch a heater without rapid on/off changes.
    6. Switches the relay off when sensor data becomes stale.

  Required Arduino library:
    - PubSubClient by Nick O'Leary

  Replace every YOUR_... value before uploading.
  Test with a low-voltage load before connecting real equipment.
*/

#include <WiFi.h>
#include <PubSubClient.h>
#include <math.h>
#include <stdlib.h>

// -----------------------------------------------------------------------------
// 1. WI-FI
// -----------------------------------------------------------------------------
const char* WIFI_SSID = "YOUR_WIFI_SSID";
const char* WIFI_PASSWORD = "YOUR_WIFI_PASSWORD";

// -----------------------------------------------------------------------------
// 2. GEIA MQTT CONNECTION
// -----------------------------------------------------------------------------
// Local example: GEIA-Gateway.local or the GrowMaster IP shown in the app.
// Cloud example: the MQTT hostname assigned to your GEIA account/location.
const char* MQTT_HOST = "YOUR_ASSIGNED_MQTT_HOST";
const uint16_t MQTT_PORT = 1883;

// Use the MQTT JWT generated by GEIA. Do not put your GEIA account username
// and password in this sketch. PubSubClient calls this protocol field
// "username", but the value sent here is the GEIA MQTT JWT.
const char* MQTT_JWT = "YOUR_GEIA_MQTT_JWT";

// false: connect to a local GrowMaster / GrowMaster Edge.
// true:  connect directly to the assigned GEIA Cloud MQTT server.
const bool USE_CLOUD_TOPICS = false;

// Required only for a direct cloud MQTT connection.
const char* LOCATION_ID = "YOUR_LOCATION_ID";

// Copy these IDs from the GEIA app.
const char* SENSOR_ID = "YOUR_SENSOR_ID";
const char* ACTUATOR_ID = "YOUR_ACTUATOR_ID";

// -----------------------------------------------------------------------------
// 3. EXAMPLE AUTOMATION SETTINGS
// -----------------------------------------------------------------------------
// Example: turn a heater on at or below 20 C, and off at or above 22 C.
// The gap between these values is hysteresis and prevents rapid switching.
const float TURN_ON_AT_OR_BELOW = 20.0f;
const float TURN_OFF_AT_OR_ABOVE = 22.0f;

const unsigned long AUTOMATION_EVERY_MS = 2000;
const unsigned long MQTT_RETRY_EVERY_MS = 5000;
const unsigned long COMMAND_RETRY_EVERY_MS = 5000;
const unsigned long SENSOR_STALE_AFTER_MS = 120000;

WiFiClient networkClient;
PubSubClient mqtt(networkClient);

String sensorTopic;
String relayConfirmTopic;
String relayForceStateTopic;
String relaySwitchTopic;

float remoteSensorValue = NAN;
int remoteRelayState = -1;
bool automationAllowed = true;

unsigned long lastSensorMessageAt = 0;
unsigned long lastAutomationAt = 0;
unsigned long lastMqttAttemptAt = 0;
unsigned long lastRelayCommandAt = 0;
int pendingRelayState = -1;
unsigned int commandAttempts = 0;

// -----------------------------------------------------------------------------
// 4. TOPICS
// -----------------------------------------------------------------------------
String topicPrefix() {
  if (!USE_CLOUD_TOPICS) {
    return "";
  }

  return "/" + String(LOCATION_ID) + "/";
}

void buildTopics() {
  const String prefix = topicPrefix();

  sensorTopic = prefix + "e/s/" + SENSOR_ID;
  relayConfirmTopic = prefix + "e/r/" + ACTUATOR_ID + "/switch/confirm";
  relayForceStateTopic = prefix + "e/r/force/" + ACTUATOR_ID + "/rstate";
  relaySwitchTopic = prefix + "e/r/" + ACTUATOR_ID + "/switch";
}

// -----------------------------------------------------------------------------
// 5. MESSAGE PARSING
// -----------------------------------------------------------------------------
int parseBinaryState(String message) {
  message.trim();
  message.toUpperCase();

  if (message == "1" || message == "ON") {
    return 1;
  }
  if (message == "0" || message == "OFF") {
    return 0;
  }

  return -1;
}

void handleForceState(String message) {
  message.trim();

  // GEIA force-state values:
  //   0   or 0 0 = automation enabled
  //   1 0        = automation disabled, relay forced OFF
  //   1 1        = automation disabled, relay forced ON
  if (message == "0" || message.startsWith("0 ")) {
    automationAllowed = true;
    Serial.println("GEIA automation control is enabled");
    return;
  }

  if (message.startsWith("1 ")) {
    automationAllowed = false;

    const int separator = message.indexOf(' ');
    const int forcedState = parseBinaryState(message.substring(separator + 1));
    if (forcedState != -1) {
      remoteRelayState = forcedState;
    }

    Serial.println("GEIA manual force override is active; bot commands paused");
  }
}

void mqttCallback(char* topic, byte* payload, unsigned int length) {
  String message;
  message.reserve(length);

  for (unsigned int i = 0; i < length; i++) {
    message += static_cast<char>(payload[i]);
  }
  message.trim();

  const String receivedTopic(topic);

  if (receivedTopic == sensorTopic) {
    // For a multi-value sensor, this reads the first number in the payload.
    char* endPointer = nullptr;
    const float value = strtof(message.c_str(), &endPointer);

    if (endPointer != message.c_str() && isfinite(value)) {
      remoteSensorValue = value;
      lastSensorMessageAt = millis();
      Serial.println("Sensor value: " + String(remoteSensorValue, 2));
    } else {
      Serial.println("Ignored invalid sensor payload: " + message);
    }
    return;
  }

  if (receivedTopic == relayConfirmTopic) {
    const int state = parseBinaryState(message);
    if (state != -1) {
      remoteRelayState = state;

      if (pendingRelayState == remoteRelayState) {
        pendingRelayState = -1;
        commandAttempts = 0;
      }

      Serial.println("Confirmed relay state: " + String(remoteRelayState));
    }
    return;
  }

  if (receivedTopic == relayForceStateTopic) {
    handleForceState(message);
  }
}

// -----------------------------------------------------------------------------
// 6. NETWORK CONNECTIONS
// -----------------------------------------------------------------------------
void startWiFi() {
  WiFi.mode(WIFI_STA);
  WiFi.begin(WIFI_SSID, WIFI_PASSWORD);
  Serial.println("Connecting to Wi-Fi...");
}

void maintainWiFi() {
  static unsigned long lastWiFiAttemptAt = 0;

  if (WiFi.status() == WL_CONNECTED) {
    return;
  }

  const unsigned long now = millis();
  if (now - lastWiFiAttemptAt < 10000) {
    return;
  }

  lastWiFiAttemptAt = now;
  WiFi.disconnect();
  WiFi.begin(WIFI_SSID, WIFI_PASSWORD);
  Serial.println("Retrying Wi-Fi...");
}

void subscribeToGeiaTopics() {
  mqtt.subscribe(sensorTopic.c_str());
  mqtt.subscribe(relayConfirmTopic.c_str());
  mqtt.subscribe(relayForceStateTopic.c_str());

  Serial.println("Subscribed to:");
  Serial.println("  " + sensorTopic);
  Serial.println("  " + relayConfirmTopic);
  Serial.println("  " + relayForceStateTopic);
}

void maintainMqtt() {
  if (mqtt.connected() || WiFi.status() != WL_CONNECTED) {
    return;
  }

  const unsigned long now = millis();
  if (now - lastMqttAttemptAt < MQTT_RETRY_EVERY_MS) {
    return;
  }
  lastMqttAttemptAt = now;

  const String clientId = "GEIA-AutomationBot-" +
                          String(static_cast<uint32_t>(ESP.getEfuseMac()), HEX);

  Serial.print("Connecting to GEIA MQTT...");

  // GEIA MQTT JWT only: no account username/password pair is stored here.
  if (mqtt.connect(clientId.c_str(), MQTT_JWT, nullptr)) {
    Serial.println(" connected");
    subscribeToGeiaTopics();
  } else {
    Serial.print(" failed, state=");
    Serial.println(mqtt.state());
  }
}

// -----------------------------------------------------------------------------
// 7. RELAY CONTROL AND AUTOMATION
// -----------------------------------------------------------------------------
bool sendRelayCommand(int state) {
  if (!mqtt.connected() || (state != 0 && state != 1)) {
    return false;
  }

  const char* payload = state == 1 ? "1" : "0";

  if (!mqtt.publish(relaySwitchTopic.c_str(), payload, false)) {
    Serial.println("Relay command could not be published");
    return false;
  }

  if (pendingRelayState == state) {
    commandAttempts++;
  } else {
    pendingRelayState = state;
    commandAttempts = 1;
  }

  lastRelayCommandAt = millis();
  Serial.println("Relay command: " + String(state == 1 ? "ON" : "OFF"));

  if (commandAttempts >= 3) {
    Serial.println("WARNING: relay has not confirmed the requested state");
    commandAttempts = 0;
  }

  return true;
}

void runAutomation() {
  const unsigned long now = millis();

  if (!mqtt.connected() || !automationAllowed) {
    return;
  }

  if (lastSensorMessageAt == 0) {
    Serial.println("Waiting for the first sensor value...");
    return;
  }

  if (now - lastSensorMessageAt > SENSOR_STALE_AFTER_MS) {
    Serial.println("Sensor data is stale; using the safe OFF state");

    if (remoteRelayState == 1 &&
        now - lastRelayCommandAt >= COMMAND_RETRY_EVERY_MS) {
      sendRelayCommand(0);
    }
    return;
  }

  if (remoteRelayState == -1) {
    Serial.println("Waiting for the confirmed relay state...");
    return;
  }

  int desiredRelayState = -1;

  if (remoteSensorValue <= TURN_ON_AT_OR_BELOW) {
    desiredRelayState = 1;
  } else if (remoteSensorValue >= TURN_OFF_AT_OR_ABOVE) {
    desiredRelayState = 0;
  } else {
    // Inside the hysteresis band: keep the current relay state.
    return;
  }

  if (remoteRelayState == desiredRelayState) {
    pendingRelayState = -1;
    commandAttempts = 0;
    return;
  }

  if (now - lastRelayCommandAt >= COMMAND_RETRY_EVERY_MS) {
    sendRelayCommand(desiredRelayState);
  }
}

// -----------------------------------------------------------------------------
// 8. ARDUINO ENTRY POINTS
// -----------------------------------------------------------------------------
void setup() {
  Serial.begin(115200);
  delay(100);

  buildTopics();
  mqtt.setServer(MQTT_HOST, MQTT_PORT);
  mqtt.setCallback(mqttCallback);
  mqtt.setBufferSize(512);

  lastMqttAttemptAt = millis() - MQTT_RETRY_EVERY_MS;
  lastRelayCommandAt = millis() - COMMAND_RETRY_EVERY_MS;

  startWiFi();
}

void loop() {
  maintainWiFi();
  maintainMqtt();
  mqtt.loop();

  const unsigned long now = millis();
  if (now - lastAutomationAt >= AUTOMATION_EVERY_MS) {
    lastAutomationAt = now;
    runAutomation();
  }
}
05
Run & Test It
Run the automation with a safe load first. Watch every state change in GEIA and in the script output.
1
Start the script
For Arduino, install PubSubClient, upload the sketch and open Serial Monitor at 115200 baud. For Python, install requirements.txt, set the environment variables and run the file.
2
Change the test value
Move the sensor below the ON threshold, then above the OFF threshold. Confirm the relay changes only at the two limits.
3
Test failures
Stop sensor messages, disconnect MQTT, restart the script and use GEIA force control. Confirm every result is safe.
Expected console order: MQTT connected → topics subscribed → sensor value received → relay state received → command sent when needed → relay change confirmed.
- If no sensor value arrives, check the local/cloud topic prefix and Sensor ID.
- If authentication fails, check that you used the MQTT JWT—not the REST token or account password.
- If the command is sent but nothing switches, check the Actuator ID, NC/NO setting, force override and relay confirmation topic.
- If cloud mode works but local mode does not, check the GrowMaster hostname/IP and that both devices are on the same network.
06
Customize Safely & Publish
After the safe test works, replace the heater example with your own automation. Keep the connection functions separate from the decision logic so it stays easy to test.
Before live use
Add clear limits
- Confirm the sensor unit and valid range.
- Use hysteresis or minimum on/off times.
- Define the safe state for missing or old data.
- Respect GEIA manual force control.
- Limit command retries and report failures.
Share your work
Publish a community extension
If your automation can help other growers, submit the script, plugin, module or repository to GEIA. Remove all secrets and include setup, license and safety notes.
Final safety check: Software can freeze, networks can fail and sensors can return believable but wrong values. Critical equipment needs independent hardware cut-offs and a safe local state.
Use the REST API documentation if you want to add event logs, alerts or configuration calls to your automation.
⚠
Automation safety note
Test with a low-voltage lamp or indicator before connecting real equipment. Confirm sensor units, relay NC/NO behavior, manual override, stale-data handling, reconnect behavior and the safe power-on state. Pumps, heaters, dosing systems, CO₂ equipment and other risky loads need independent limits and physical fail-safes. A script must never depend on one sensor, one network connection or one software check for safety.

